Rooms with built-in recording systems
All normal classrooms!
Rooms without recording systems
Small conference classrooms: 122, 123, 129
- Let us know! Email your request with dates/times/room to: media@law.berkeley.edu
- We will let you know about microphone requirements for your particular room
- Your classrooms will be recorded between the exact start and end times of your class schedule, so keep in mind it will include conversation at the podium beginning at your class start time, and it will not include anything beyond your class end time. (see below if you need to edit something out)
- The recordings will show up within a hour or two in your private My Media page in bCourses as they have been with Zoom cloud recordings
- Before publishing to your students you have the opportunity to edit the video or set a publishing schedule (see below)
- Important: Publish the recording to your course Media Gallery (see below)
The simplest way to record your classes in these rooms is to use Zoom on your laptop or the classroom iPad.
- If you have a laptop, set it up on the podium, open Zoom, launch a meeting and record to the cloud. Cloud recordings will show up in your My Media.
- Share screen if you are showing slides and want them in the recording.
- You can use your laptop camera to try to capture yourself, or simply turn off your camera in the zoom session for an audio (plus optional screen share) recording.
- Check out this video to see how it’s done!
- iPad option: If you do not have a laptop you can use Zoom on the iPad at the podium. You’ll need to log in to your account (using SSO) and be sure to log out after class. For this option we recommend scheduling a meeting with us in the room and we can show you how it’s done.
- Important: Publish the recording to your course Media Gallery (see below)
- Log in to bCourses and go to your My Media page which should appear in the left navigation of every course. This is your own private media collection. You should see your recordings here within approximately an hour or two after class.
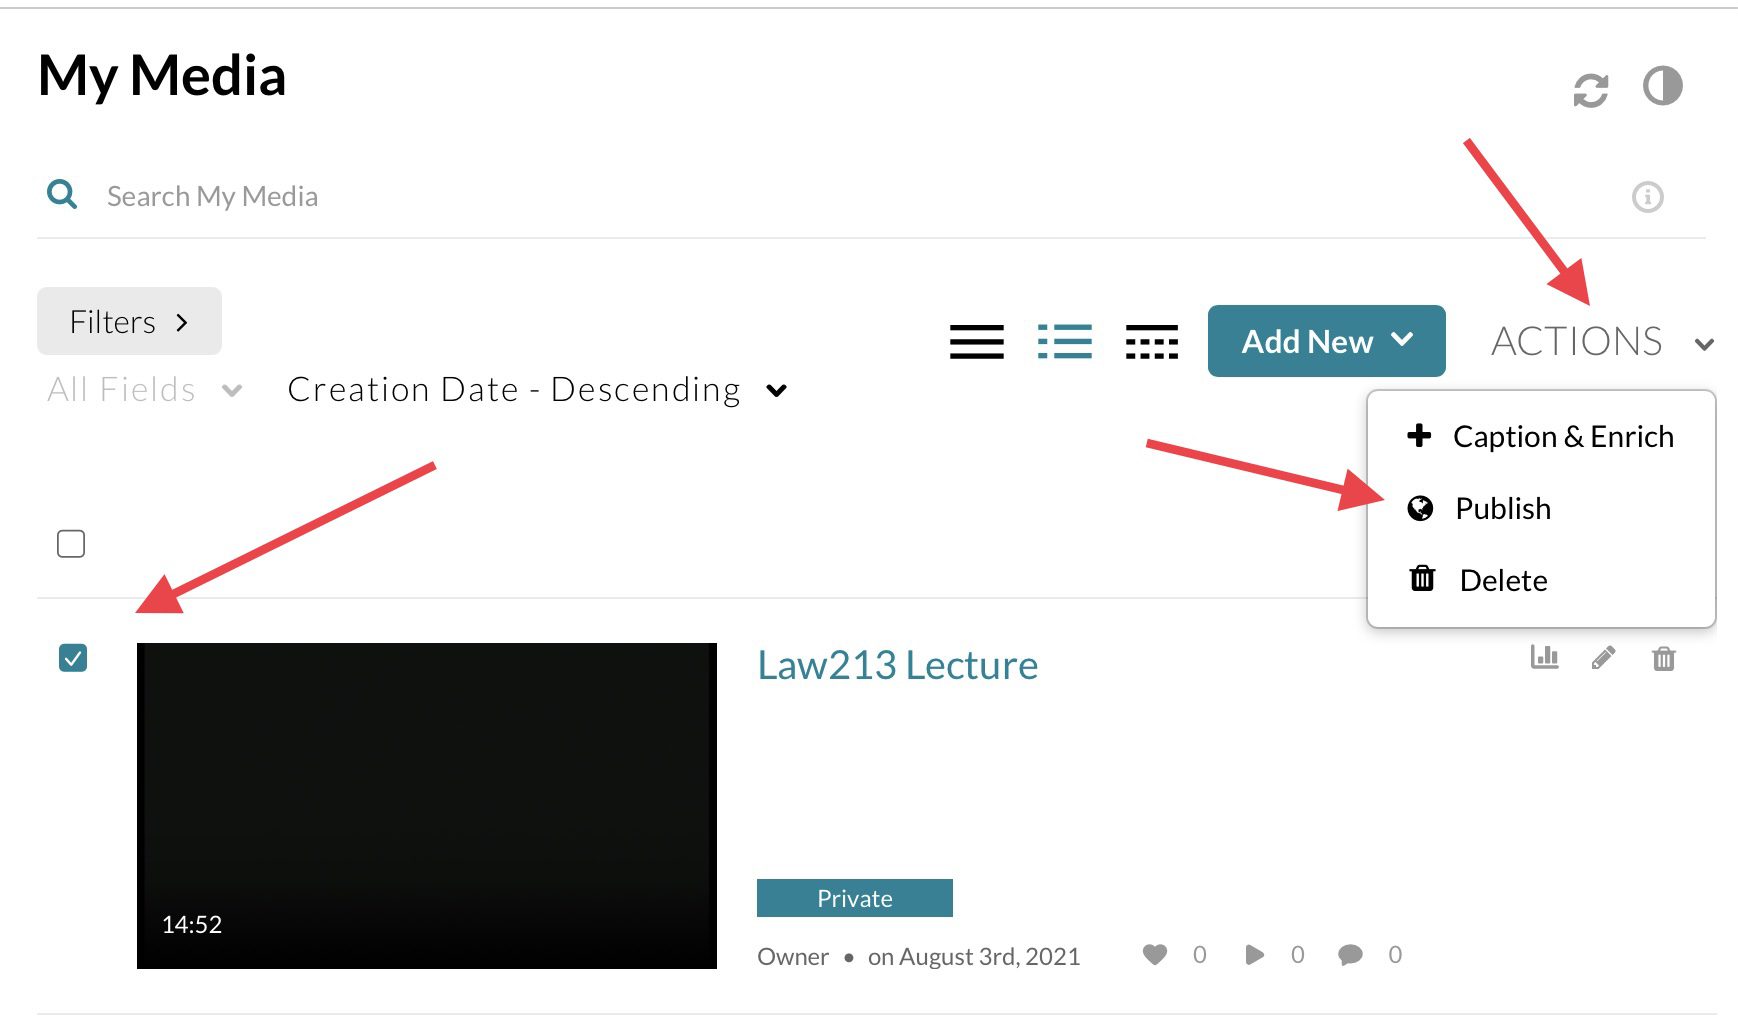
- Select the checkbox to the left of each media item you want to publish.
- Scroll to the top of the page and from the Actions menu, choose Publish.
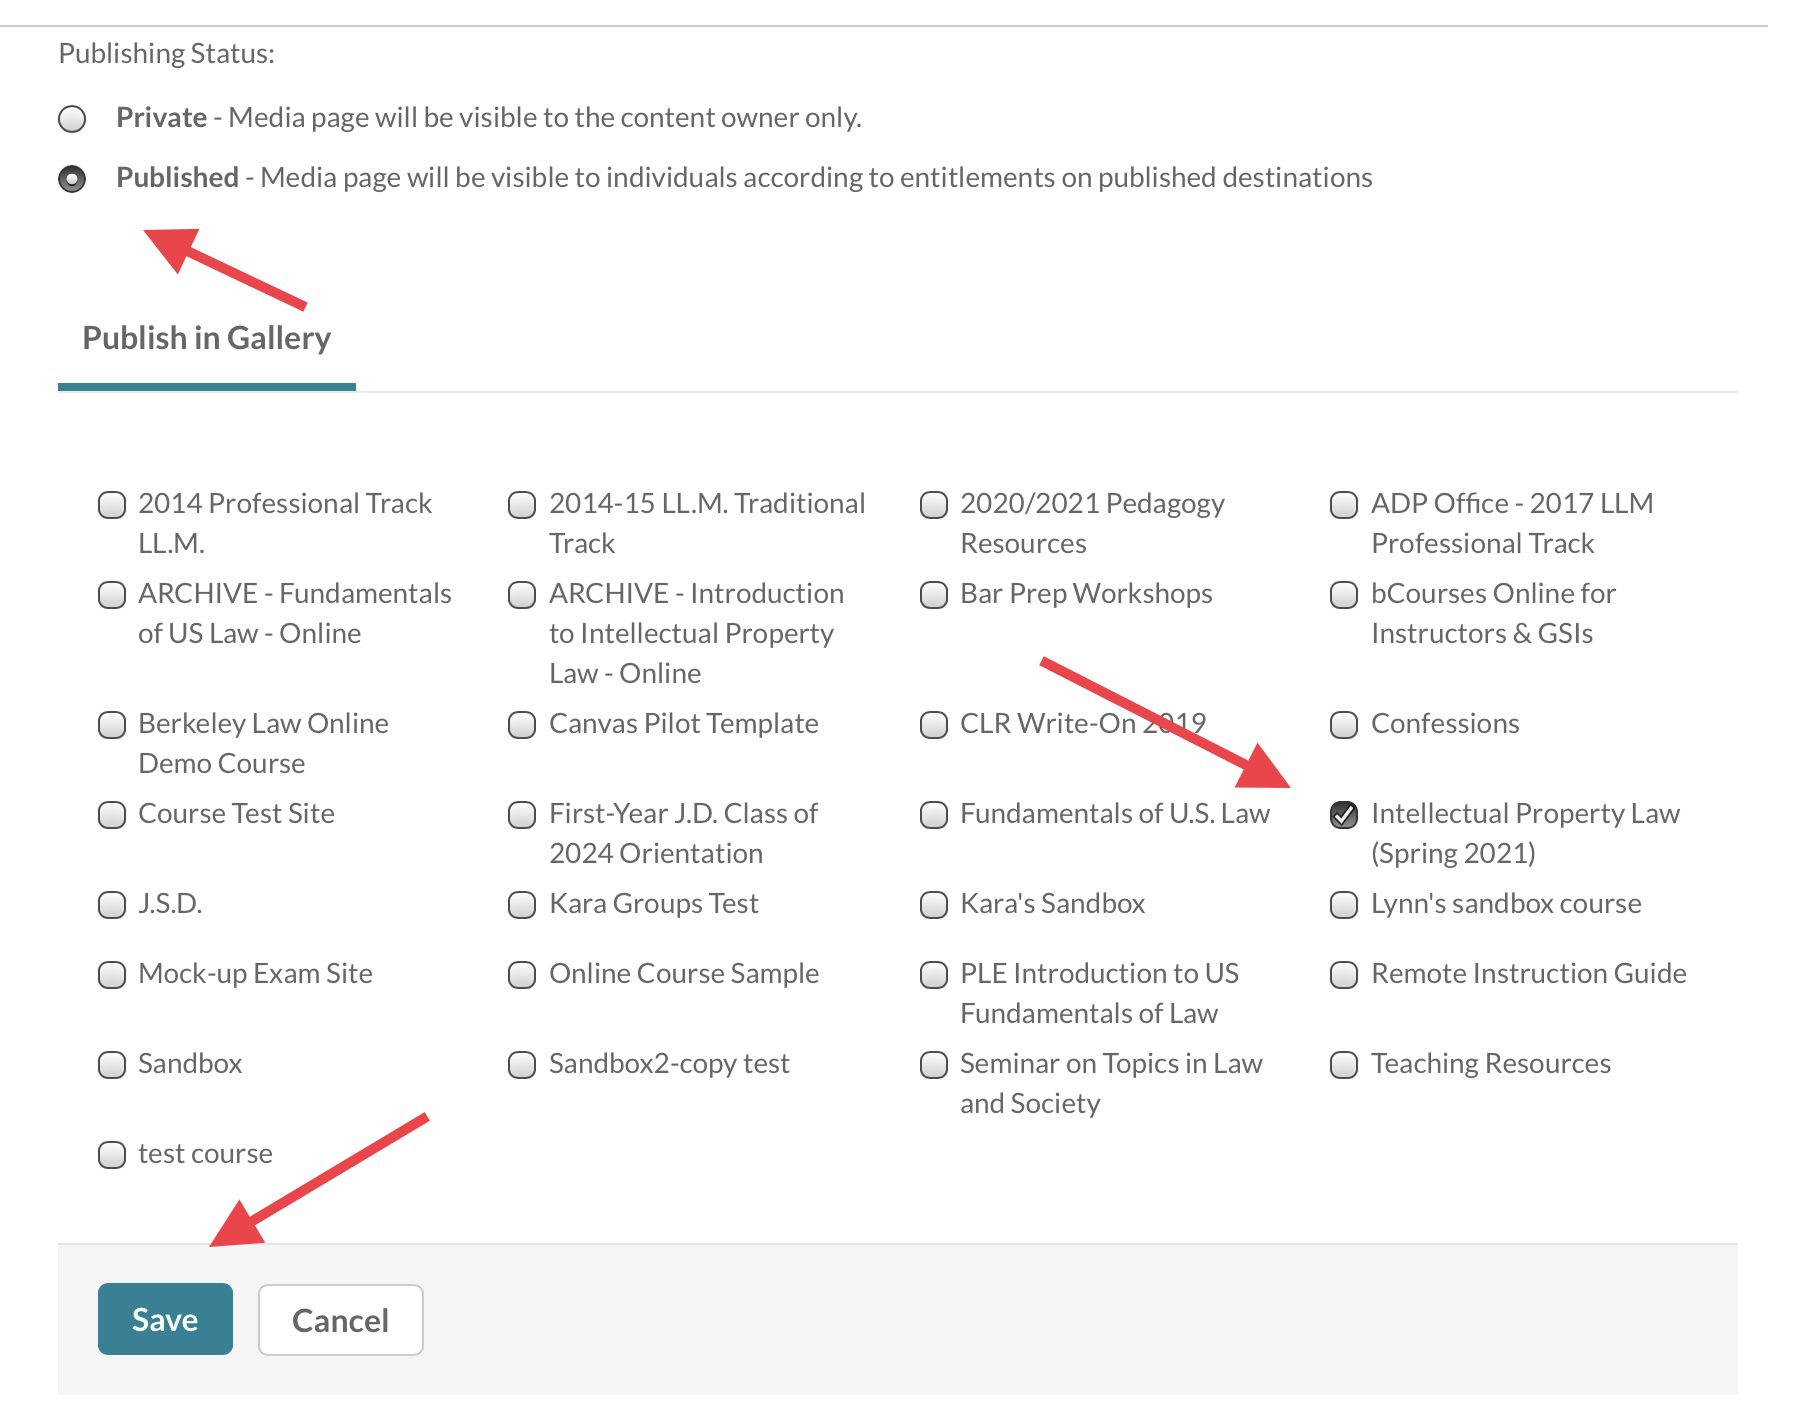
- Click the Published radio button if it is not already selected.
- The “Publish in Gallery” selector should be visible. Select the course site(s) to which you want the media published to the site’s Media Gallery. Click Save.
- The Media item(s) you selected are now visible to enrolled students in the Media Galleries of the course site(s) you selected.
For more info see: Campus guide
You can set a start date and end date for when your classroom recordings are available to students. This can be useful if you have any concerns about the effect of unlimited availability immediately following the live class on attendance or study patterns. Here’s how:
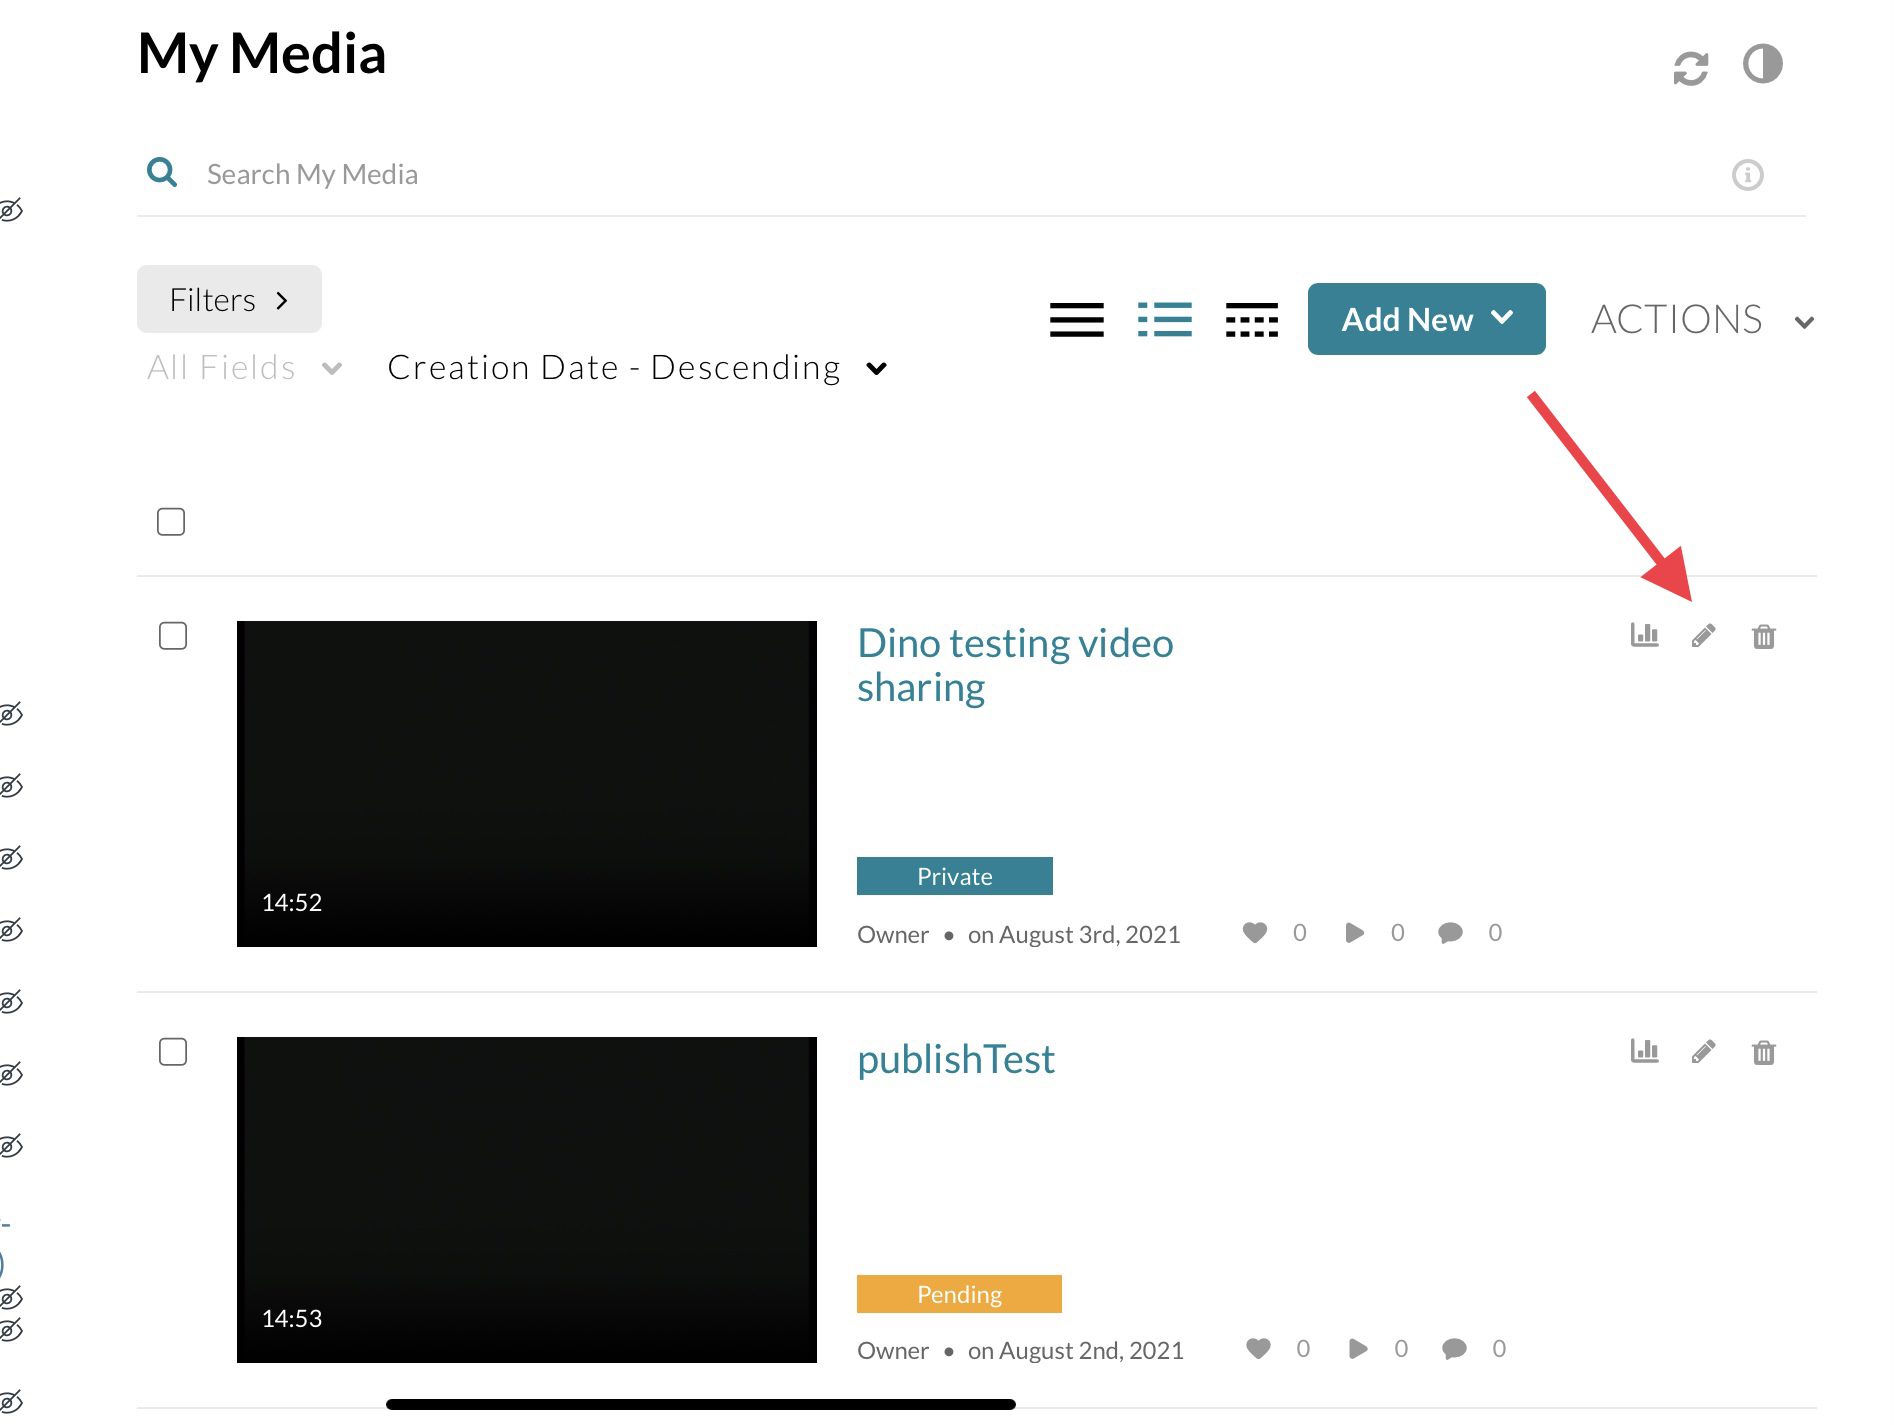
- In My Media, click on the pencil icon to the right of the recording to get to the edit page.
- Scroll down to find the ‘Publishing Schedule’ option
- Choose ‘Specific time frame’ and set your dates and times.
This sets the dates but you still need to publish to a particular course media gallery using the “Publish your recordings” instructions on this page.
There may be times when your classroom recording includes content you do not want in the recording, such as private conversations at the podium. There is a simple video editor within My Media that you can access to trim the beginning or end of your recording, or even snip out a section in the middle.
To get to the editor from your My Media page:
Click the pencil icon to the right of the video you want to edit. You will then see a big ‘Launch Editor’ button to the right of the video.
Feel free to experiment with the editor, or contact us for a brief training.
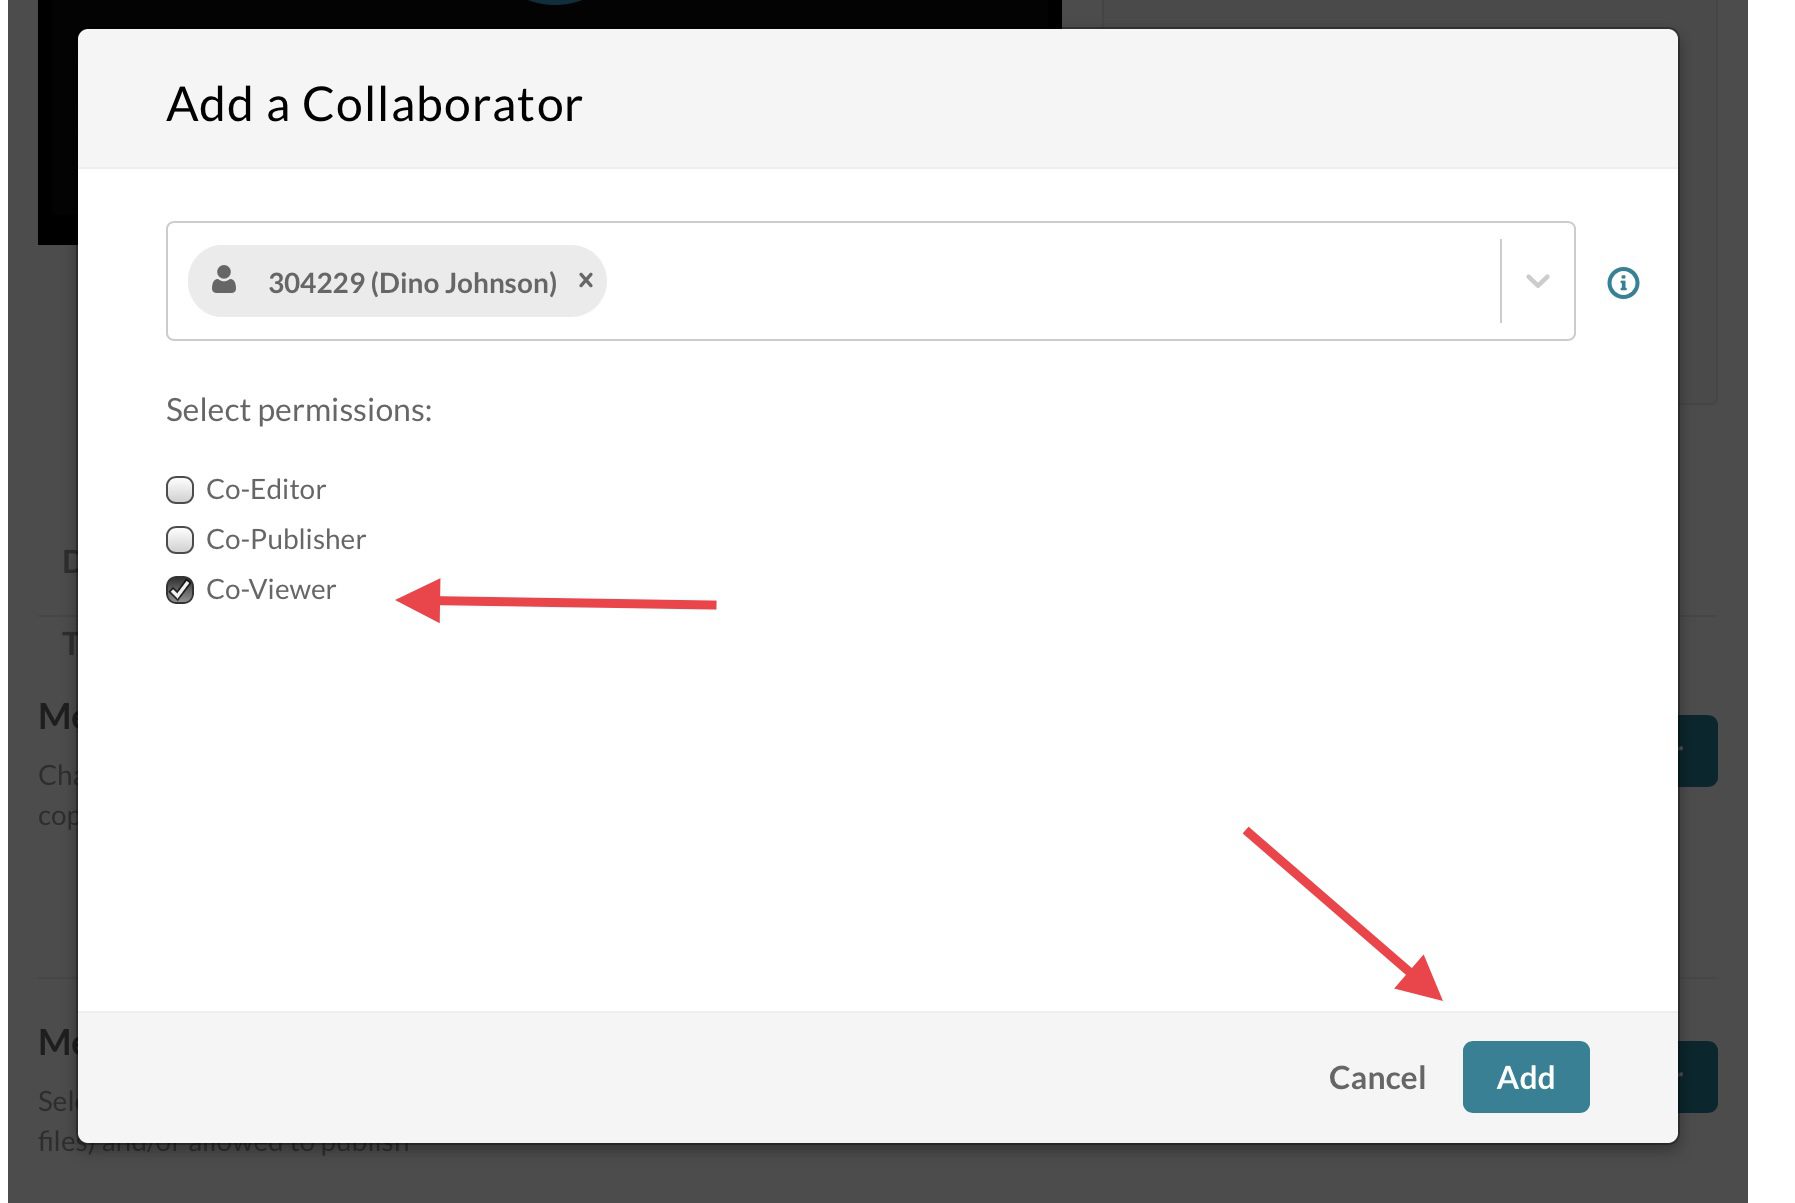
You can share your media with specific individuals instead of, or in addition to, the entire course. Everyone (including students) who has access to bCourses has their own My Media, and recordings you share with them will show up in their own My Media collection. Here’s how:
- On your My Media page, click the pencil icon to the right of the recording you want to share.
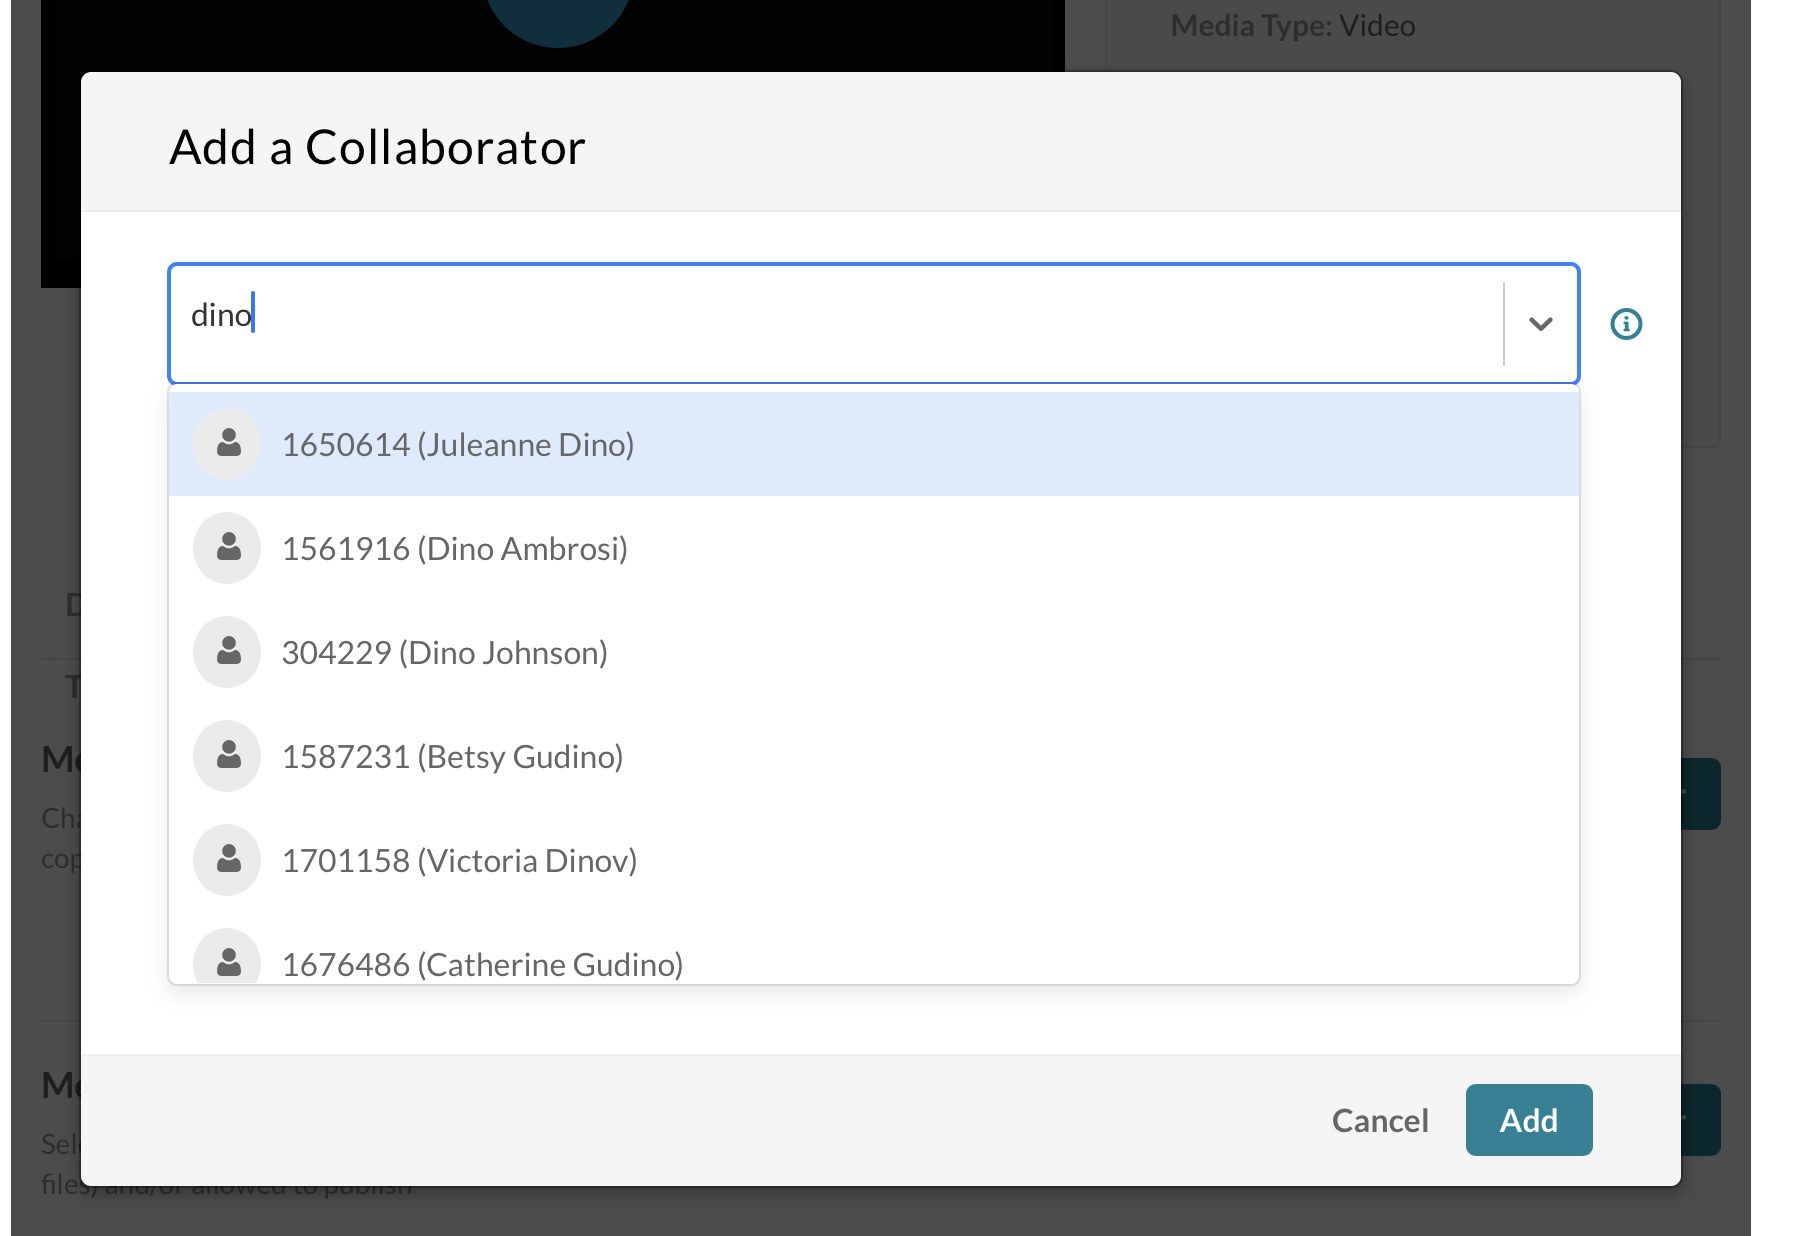
- Click the ‘Collaboration’ tab and then ‘Add Collaborators’.
- Type in the last name of the person. You should see options pop up as you type, when you see the one you want, select it.
- Check the ‘Co-Viewer’ box and click ‘Add’
- The recordings will show up on Students’ My Media page. My Media can be found in the global navigation which is located on the left side of the page
- That’s it! See screenshots below:
For help with any of these processes please do not hesitate to reach out to the Media Services team:
