We are using CalCentral (calcentral.berkeley.edu) to enroll in classes again this semester. Please review the instructions below for a step-by-step guide. If you have questions about enrollment check out our FAQs page and watch our video guide for answers.
Please follow these instructions for your enrollment:
Part 1- Go to the Schedule of Classes to Select Your Classes
https://www.law.berkeley.edu/php-programs/courses/courseSearch.php
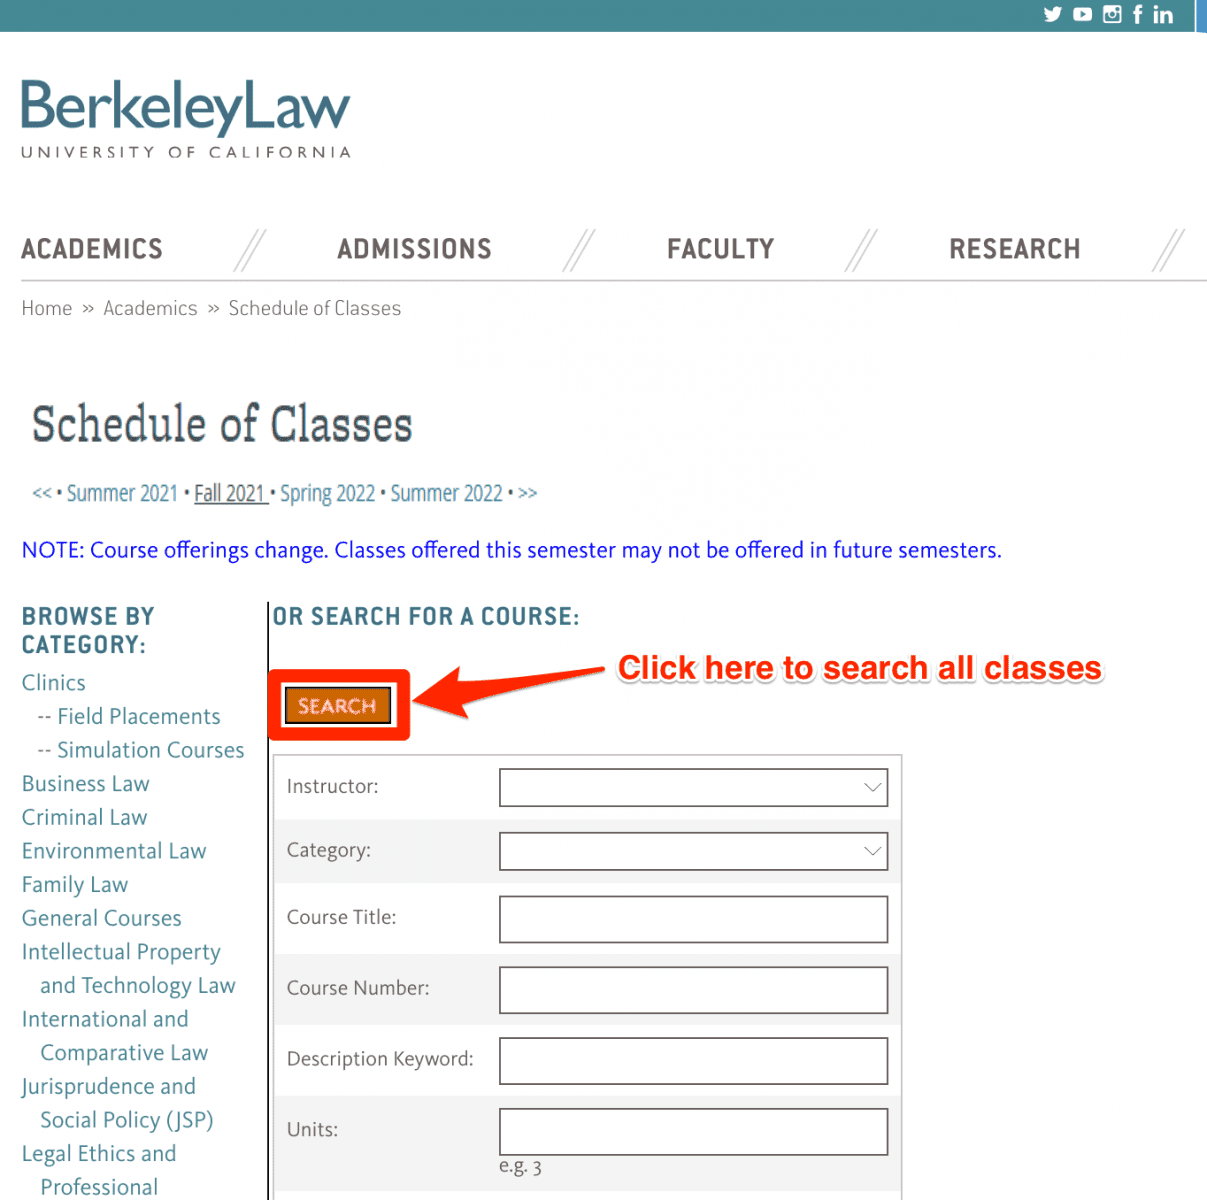
Find the five digit ‘Class Number’ for each class that you want to take (hint: you may need to scroll down):
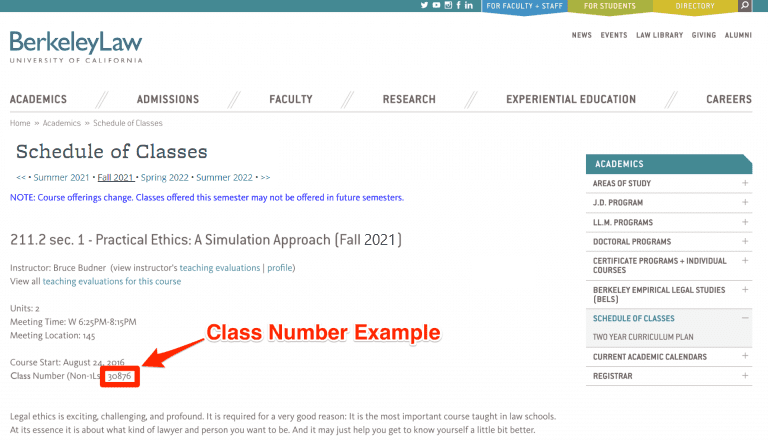
Pro Tip: Keep a tab open or save the Class Numbers in an open doc that you can refer back to as you enroll.
Part 2 – Go to CalCentral to Enroll in Classes
Log in to CalCentral (calcentral.berkeley.edu) using your CalNet ID.
Choose ‘My Academics’ from the blue navigation bar at the top of the page

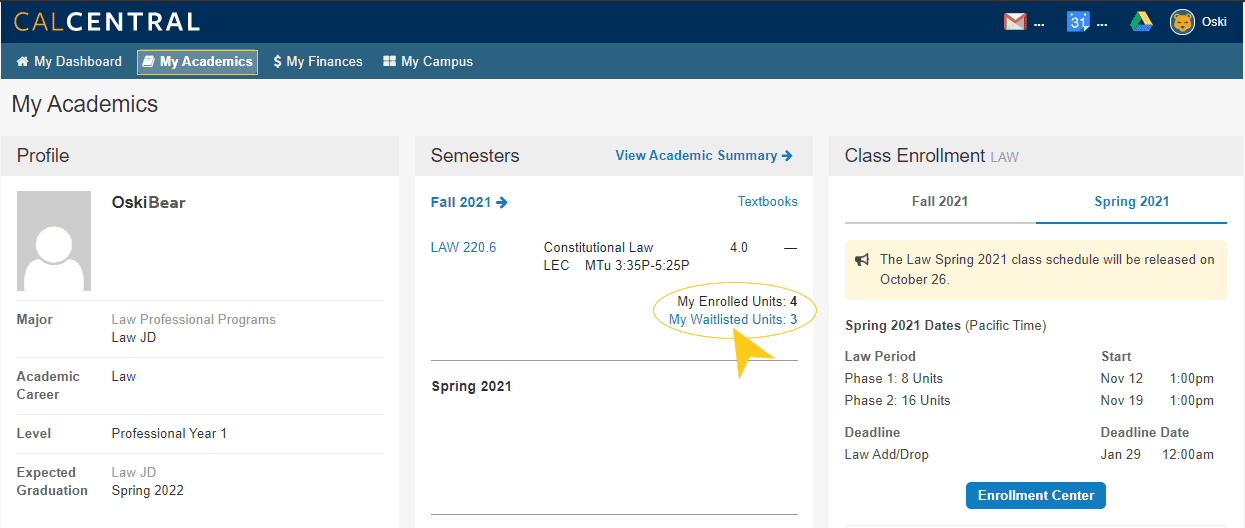
Find your ‘Class Enrollment’ card in the right hand column of the My Academics Page.
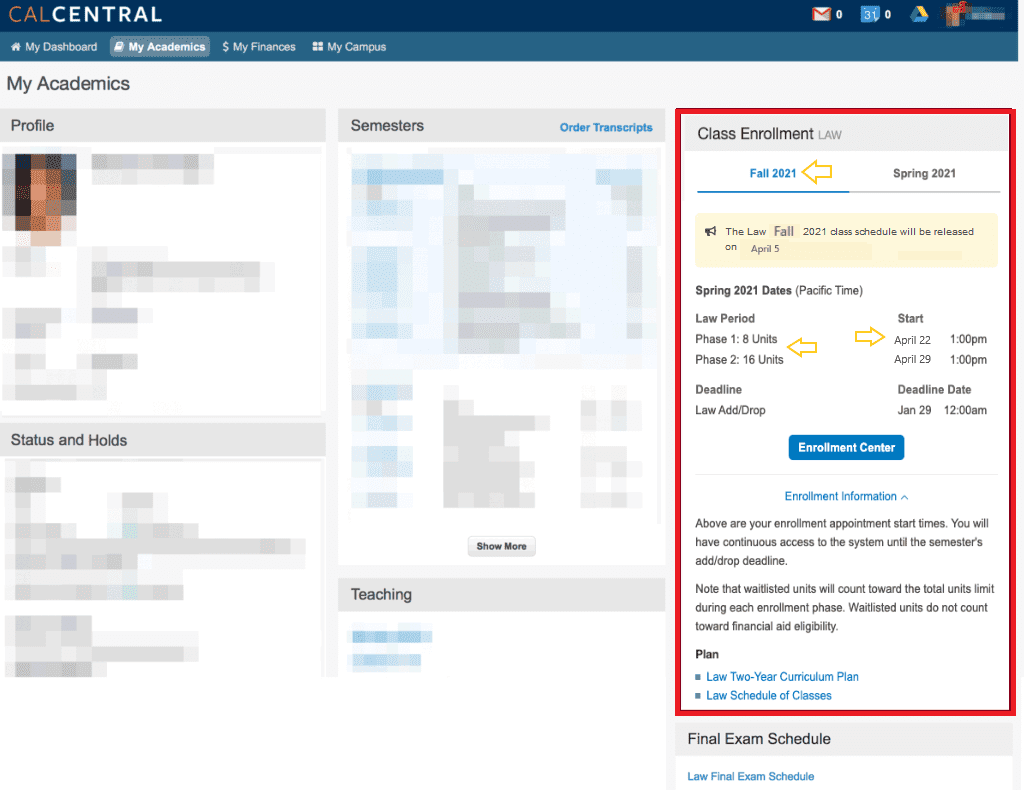
Here a few things to notice on your Cal Central Enrollment Card:
-
-
- The tabs at the top of the card show which semester you will be enrolling into.
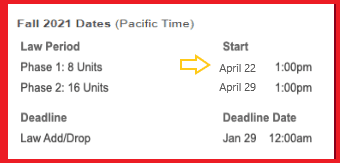
- Enrollment times for Phase 1 and Phase 2 are on the right.
- Maximum units for Phase 1 and 2 enrollment are on the left.
-
Pay special attention to your enrollment times. You do not want to miss them:
Part 2 A – Select Enrollment Center to Create a Shopping Cart now so you can save time later
You won’t be able to enroll in classes until your appointment time begins but you can start adding classes to your shopping cart now. Then, when your enrollment appointment begins, you can quickly enroll by selecting the classes you want from your shopping cart.
To create a shopping cart, select the blue Enrollment Center button on your your Enrollment Card.
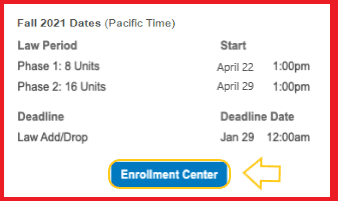
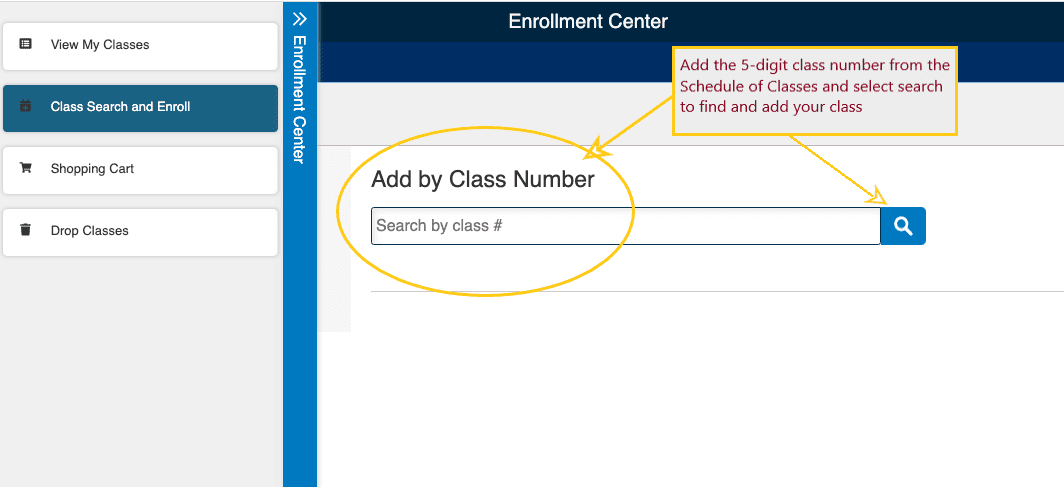
The Enrollment Center Button will take you to Class Search and Enroll to begin the four step process to add classes to your shopping cart. Be sure to select the correct semester in which you are enrolling.
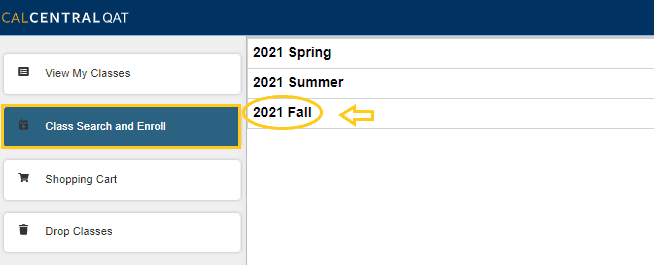
Step 1: Review and Select Class – First, Enter the 5 digit class number from the Schedule of Classes. Select Enroll or Add to Cart.
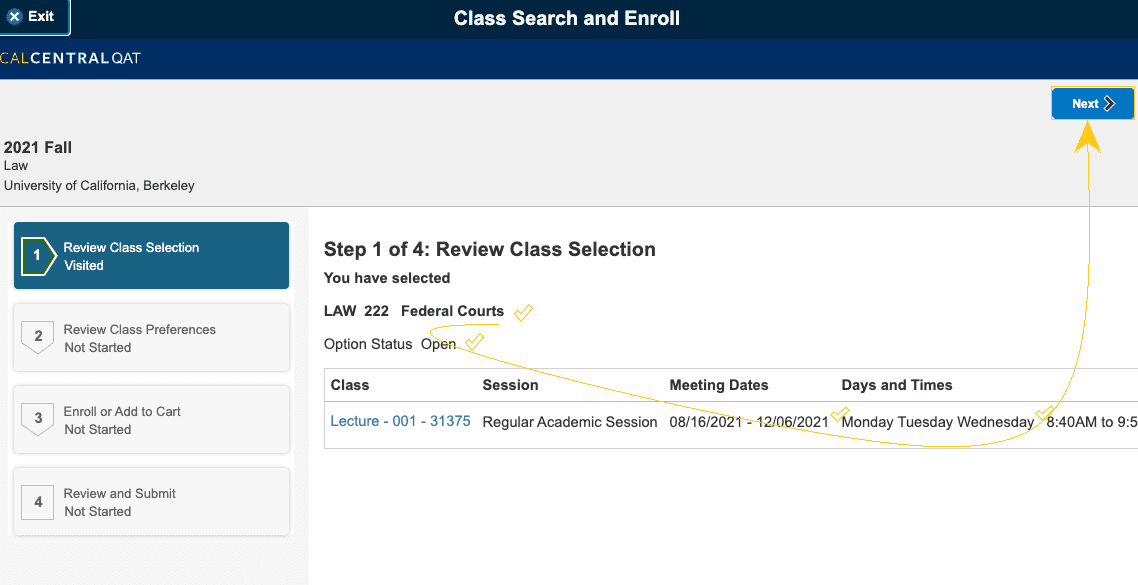
Confirm you have the correct course, then select Next
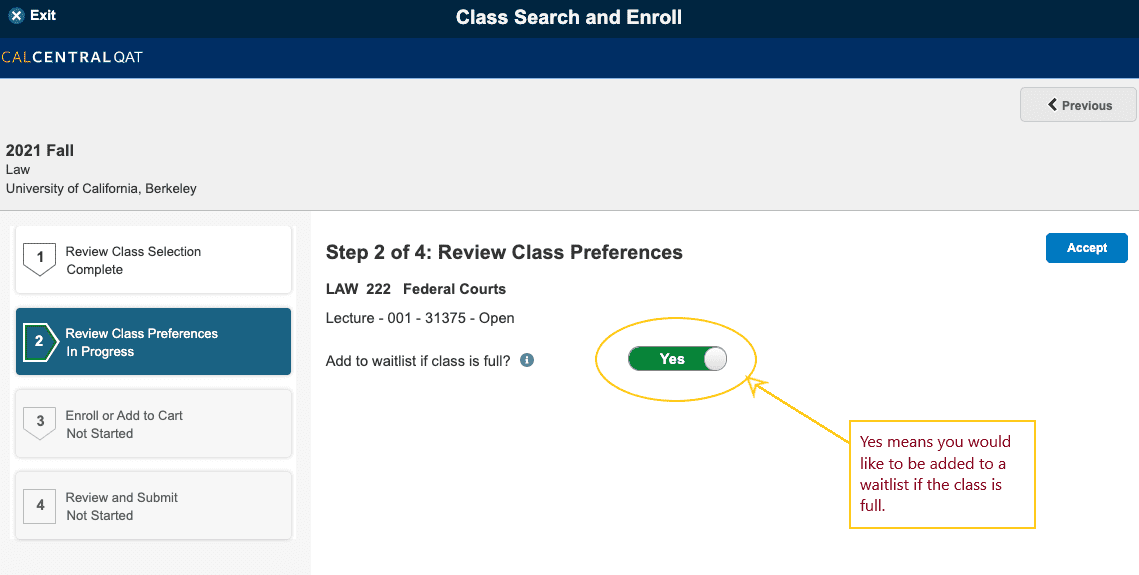
Step 2: Review Class Preferences – Confirm that Add to Waitlist is selected and the toggle bar is green for yes, then select Accept
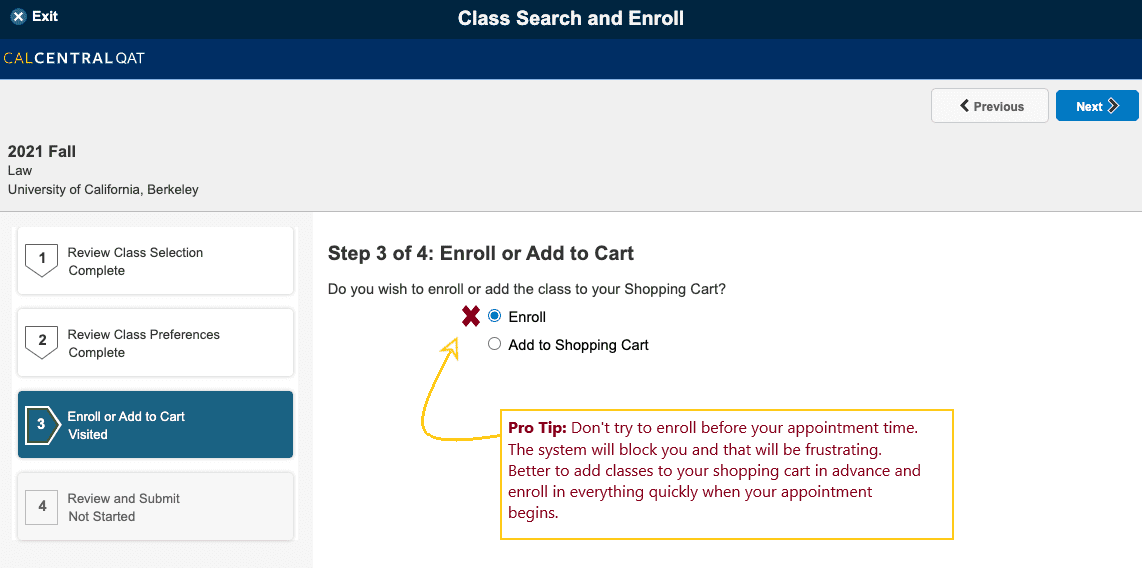
Step 3: Enroll or Add to Cart – You will not be able to enroll in any classes until your appointment begins so be sure to select Add to Shopping Cart, then select Next
If your enrollment time has not yet started you will not be permitted to enroll. Best practice is to add classes to your shopping cart in advance and enroll when your appointment begins.
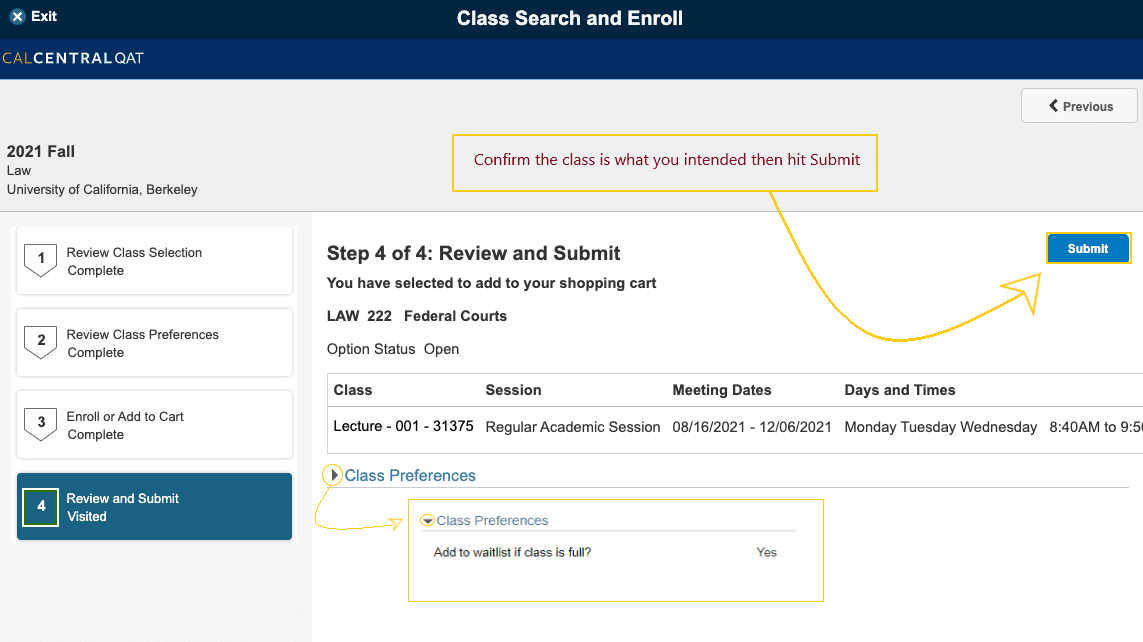
Step 4: Review and Submit – Confirm you have the correct course then select Submit
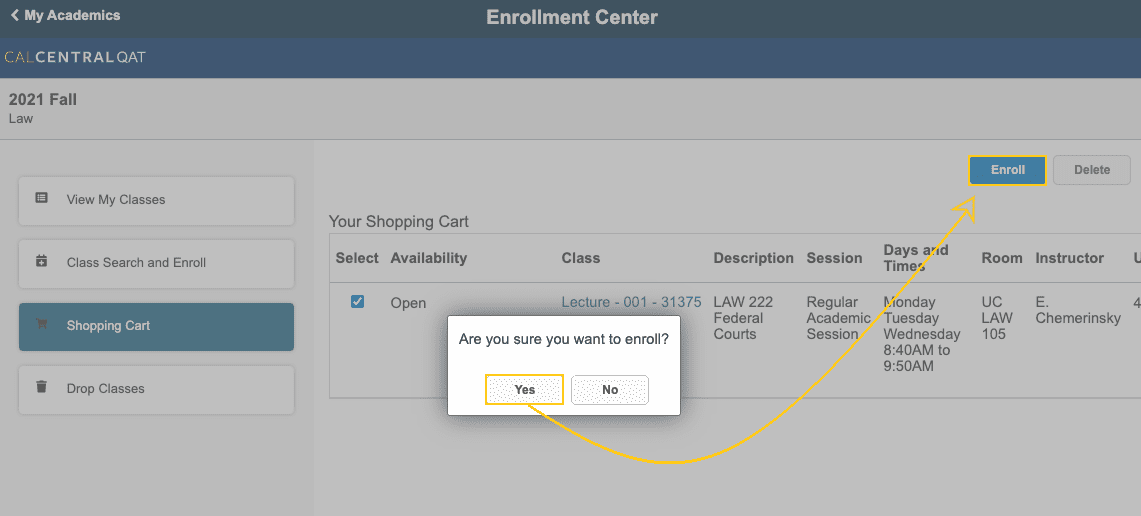
Select Yes, Select Enroll – The pop-up window will ask if you are sure you want to submit. Select Yes and then Enroll. (Note: The “Enroll” button will appear next to the “Delete” button once your enrollment appointment starts.)
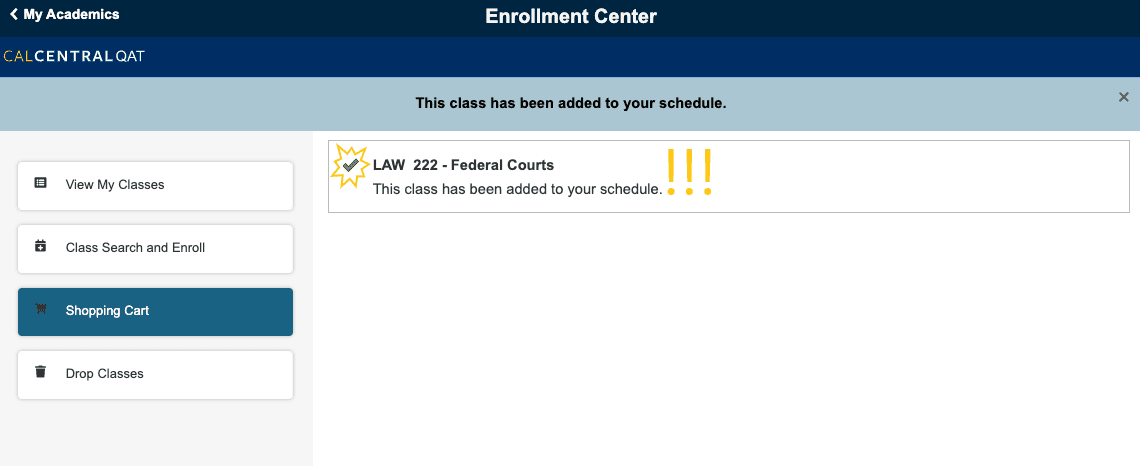
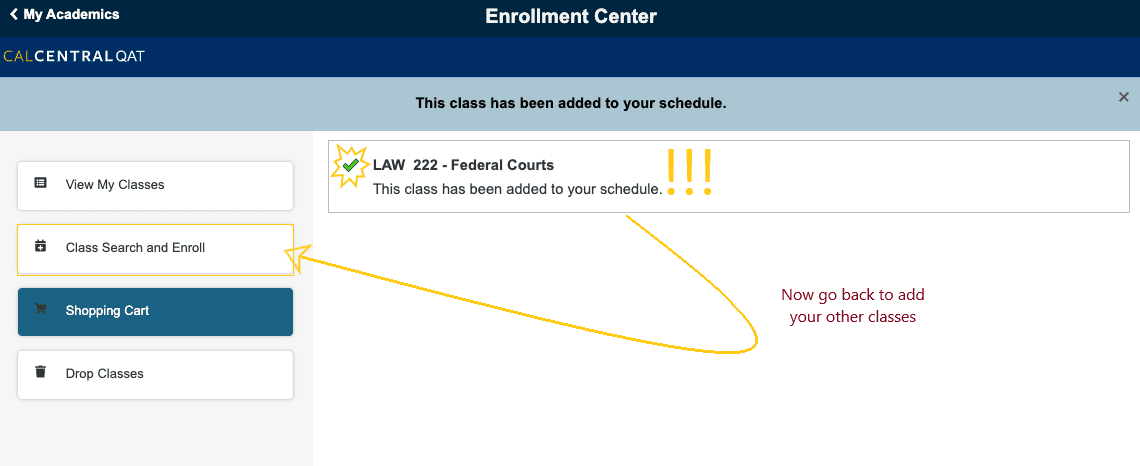
Success!
Go back to Class Search and Enroll to repeat steps 1-4 for each class you want to enroll in. Add everything to your shopping cart ahead of time to enroll quickly when your appointment begins. You can add as many units as you like to the shopping cart. Once your enrollment appointment begins you will be limited to adding 8 units in Phase 1 and up to 16 units in Phase 2.
Once you’ve added all your classes, go to the Shopping Cart tab
Check your shopping cart early to confirm that all the classes you want are already there. A few things to notice while you’re there:
- Check Course Availability – Course Availability will tell you if the class is open or full. If it’s full, you can add yourself to the waitlist.
- Note that availability may change–a course that is open when you added it may have a waitlist at the time you enroll.
- Check Days and Times to make sure that the classes you are enrolling do not meet at conflicting times.
- Check Units – Check your units to confirm that you are not enrolling in more than the 8 units allowed in Phase 1 or 16 units in Phase 2.
- Check Preferences – Change Preferences will allow you to confirm that you would like to be added to the waitlist if the class is full.
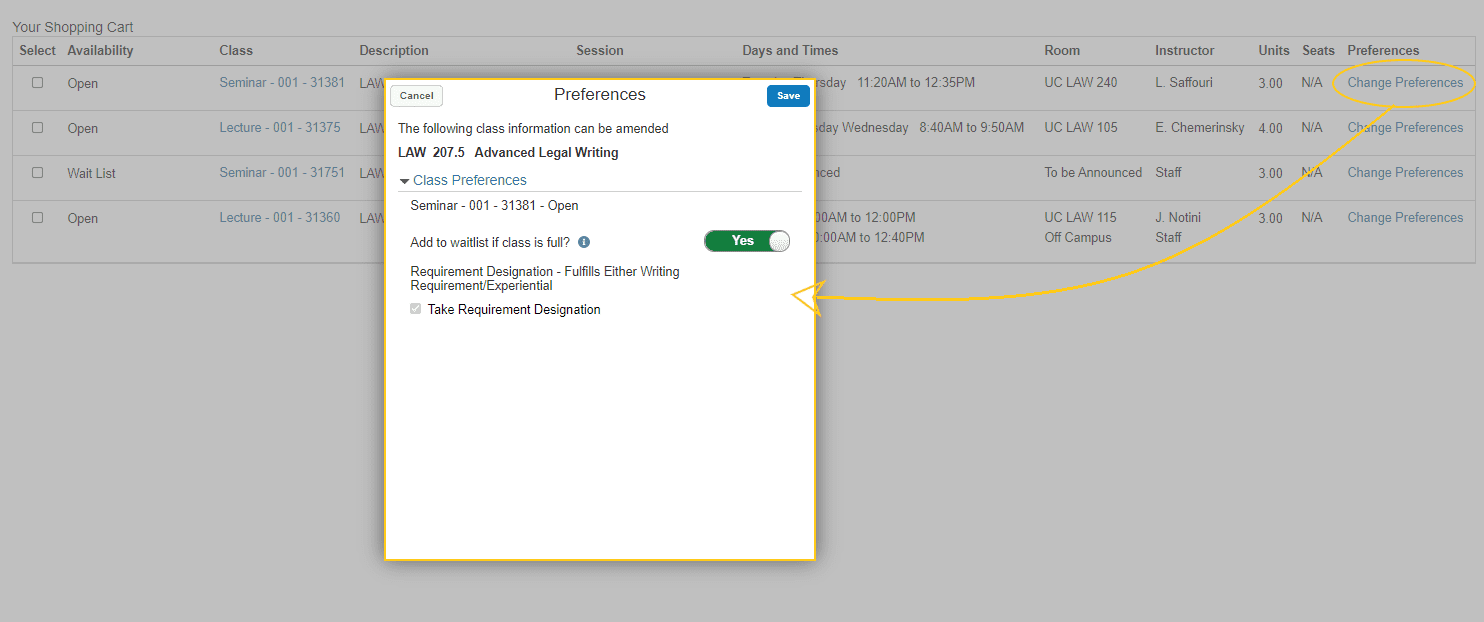
Caution: You are not yet enrolled. This is just a shopping cart. You can begin enrolling at the start of your enrollment time. To do so, you will select the classes you want in the shopping cart, then select Enroll.
Part 2B – Finish your Enrollment
When it is your appointment time, go to the shopping cart tab to enroll in all your classes at once. Select the classes you want to enroll (remember in Phase 1 you are limited to 8 units, in Phase 2 you may enroll in up to 16 units). Remember that waitlisted units will count towards your unit total:
You can return to your shopping cart to enroll in other classes if you were not able to enroll or if you were waitlisted in your preferred classes. If you are at your unit limit, you may need to drop a waitlisted or enrolled class in order to enroll in something else.
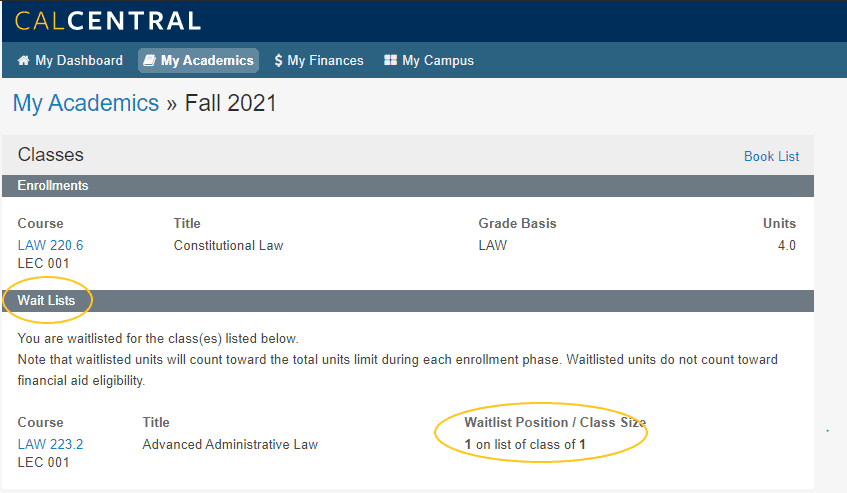
Waitlisted Classes
When you are finished enrolling, your enrolled and waitlisted classes will appear in the View My Classes Tab within the Enrollment Center.
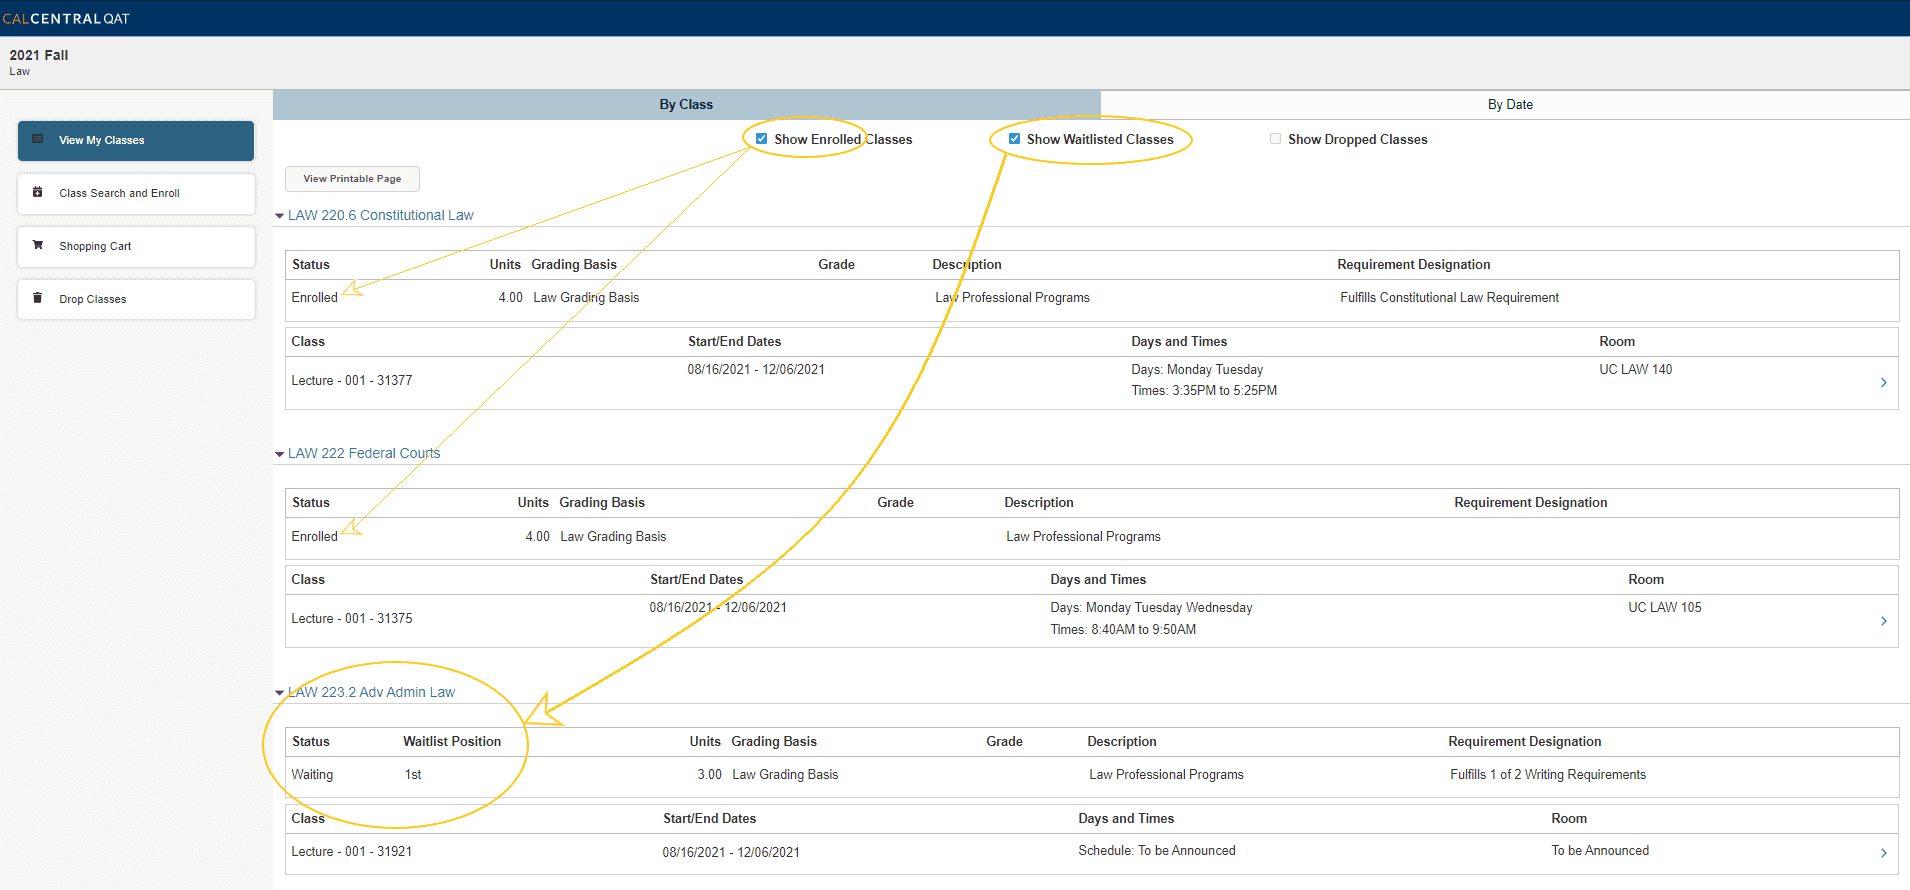
You can also see waitlisted classes on your My Academics page in CalCentral.
What if I want to drop a class?
Within your shopping cart you can add and drop classes before you enroll. Once you’re enrolled or waitlisted, you will need to use the Drop Classes tab in the Enrollment Center.
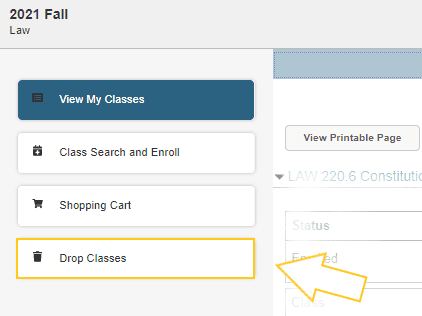
Select the class you’d like to drop then select Next
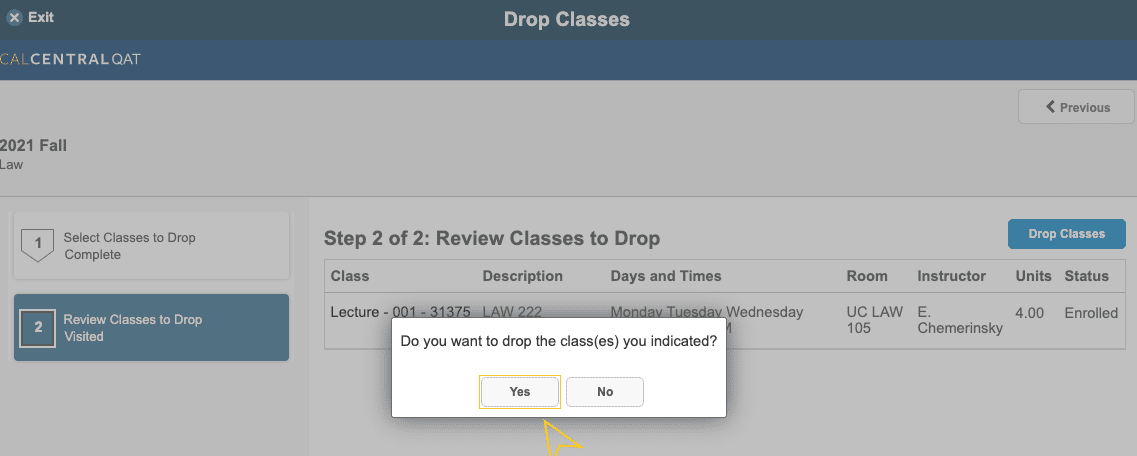
Click Yes to confirm your selection
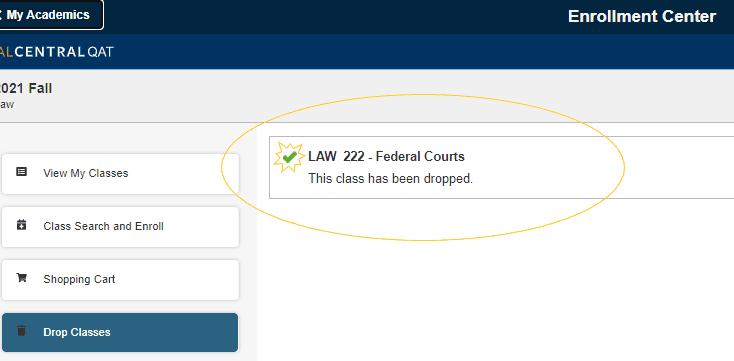
A successful drop will be confirmed with a green check mark
Questions?
If you have questions please contact the Registrar’s office at registrar@law.berkeley.edu or call us at 510-642-2278.
